Overview
After an end user is authenticated with the configured identity provider bythe Cloudentity platform, the user is redirected toa consent page where they can accept or reject consents. Cloudentity provides you with acapability to create a custom consent application and integrate it into the OAuth flow to tailorrich user experience. A custom consent page may be desired if the styling customizations capabilityprovided by Cloudentity does not match the target UX/CX guidelines or if there are other UXinteractions, data points, or texts that need to be displayed within the consent page.One of the main usecase for custom consent pages arethe Open Banking scenarios where theconsent page also requires bank account information of the interacting user, and more.
Let’s take a look at a detailed sequence diagram for handshakes between various actors in theconsent flow:

In summary, the user-agent is redirected to the Cloudentity authorization server,which redirects the user to configured identity provider for authentication . Once authenticated,Cloudentity redirects the user to the consent page location specified in theconfiguration. The consent application invokes the Cloudentity scope grant requestAPI to retrieve more details about the consents that need to be displayed to the user. At thispoint, the application can also interact with other system to collect and display other dataelements if necessary. The application displays the consent text to the user and the user canaccept all, reject all, or accept only some of the consents. On user action, the selection mustbe submitted back to Cloudentity for persistence and the system returns a redirectURL in response. The application redirects the user back to the URL provided byCloudentity.
Reference Repository

Check out the below GitHub repository for complete source code of the reference application in this tutorial
Prerequisites
- Cloudentity tenant
- Node.js - Recommended v16.x +
- ExpressJS - Recommended 4.16.1 +
Configure Cloudentity
Create a new worskpace within Cloudentity.
Enable a custom consent page in Cloudentity.
For the Consent URL field, point it to the application that is being developed and will rununder
http://localhost:4001/consent.
Cloudentity workspace is now configured to redirect the user to the custom consentapplication served by our Node.js application for OAuth flow(s) that require user consent.
Explore the Node.js Application
The Node.js application consists primarily of two javascript files (app.js and index.js )and some templates for rendering the HTML. The app.js file has the boilerplate code forsetting up the Express.js application and we use Handlebars.js for the view engine.There should be nothing unfamiliar here but if you need a refresher check out ExpressJS.
Define basic route & env variables
Inside the routes folder lets look at the index.js file. It contains the handlers andhas the logic implementation for getting an authorization token, obtaining the consent request,and accepting or denying the consent request.
Let’s first define some environment variable to hold the configuration parameters to establishcommunication with Cloudentity APIs. Consent application needs to obtain anaccess token from the Cloudentity System workspace to make authorized APIcalls to fetch scopes and related metadata.
TENANT_ID- Cloudentity SaaS tenant IDAUTHORIZATION_SERVER_URL- Cloudentity OAuth issuer URL obtained while registeringthe consent appCLIENT_ID- OAuth client ID of the consent application obtained while registering the consent applicationCLIENT_SECRET- OAuth client secret of the consent application obtained while registering theconsent application
const tenant_id = process.env.TENANT_ID;const issuer_url = process.env.AUTHORIZATION_SERVER_URL;const client_id = process.env.CLIENT_ID;const client_secret = process.env.CLIENT_SECRET;In this tutorial, we use the OAuth client authentication method as
Client Secret Basic. Other client authentication mechanisms may be used and we haveutilizied this method just as an example. In case you need to use a differentmechanism please update your Node.js app accordingly.We will use theCLIENT_IDandCLIENT_SECRETto create the “Basic” authorization token headerto identity the OAuth client and obtain an accessTokenfrom Cloudentity.
const auth_token = Buffer.from(`${client_id}:${client_secret}`, 'utf-8').toString('base64');When obtaining an access token using the Client Secret Basicclient authentication method, this is not theaccess token that the OAuth client uses for accessing the users protectedresources. Instead, this is for the custom consent application to fetchand submit consents back to the Cloudentity platform.
Let’s first add a route to ensure application is running and responding to requests.
router.get('/', function (req, res, next) { res.render('health');});Add Consent Page Route
Let’s add a route to handle requests directed to the consent application at /consent.Cloudentity provides the login ID and login state parameters during the redirect toconsent application. If they are missing, the application should display an error and returnthe user back to their application.Using the login ID retrieved from the query parameter, the application can retrieve moredetails about the scopes that should be displayed to user for consent using thegetScopeGrants function as shown below.
router.get('/consent', (req, res) => { const login_id = req.query.login_id; const state = req.query.login_state; if (state == null || login_id == null) { res.render('error', { msg: 'missing state and/or login id' }); return; } appState.id = login_id appState.state = state getScopeGrants(res);});getScopeGrants fetches an access token from Cloudentity to call the APIs to getthe consent details. Once the application has the access token, it is utilized to get thescopes that need to be displayed to the user as implemented in the getScopeGrantRequest method.
const getScopeGrants = async (res) => { // An access token is required for making a scope grant request. appState.access_token = await getAccessToken(res); if (appState.access_token == null) { return; } // Once we have an access token we make an API call for a scope grant request. getScopeGrantRequest(res);}Let’s take a quick look at the token endpoint to fetch an access token usingthe Token Endpoint API.
const getAccessToken = async (res) => { let CLOUDENTITY_TOKEN_FETCH_API = getTokenURL(); try { const data = qs.stringify({ grant_type: 'client_credentials', scope: 'manage_scope_grants', state: appState.access_token }); const options = { method: 'POST', url: CLOUDENTITY_TOKEN_FETCH_API, rejectUnauthorized: false, headers: { 'Content-Type': 'application/x-www-form-urlencoded', Authorization: 'Basic ' + auth_token }, data: data }; const response = await axiosInstance(options); return response.data.access_token; } catch (error) { console.log(error); res.render('error', { msg: 'error getting access token: ' + error }); }}function getTokenURL() { return origin + '/' + tenant_id + '/system/oauth2/token';}Once we obtain an access token we make the scope grant request using the Consent Request API.
const getScopeGrantRequest = async (res) => { let CLOUDENTITY_SCOPE_GRANT_FETCH_API = getScopeGrantURL(); const options = { url: CLOUDENTITY_SCOPE_GRANT_FETCH_API, method: "GET", headers: { 'Content-Type': 'application/x-www-form-urlencoded', 'Authorization': 'Bearer ' + appState.access_token, } } try { const response = await axiosInstance(options); appState.redirectURI = response.data.request_query_params.redirect_uri[0]; res.render('consent', { scopes: response.data.requested_scopes }); } catch (error) { console.log(error); res.render('error', { msg: 'error getting scope grants: ' + error }); }}function getScopeGrantURL() { return origin + '/api/system/' + tenant_id + '/scope-grants/' + appState.id + '?login_state=' + appState.state;}The response from the scope grant request includes all the requested scopes by the application.
Now, we need to display the requested scopes to the user. The HTML templates are stored in theviews folder and the consent view template is in views/consent.hbs. For each scope,the application displays the display_name of the scope and the description.Once the page is rendered, the user can choose the scopes they wish to allow or reject.
<!doctype html><html lang="en"><head> <meta charset="utf-8"> <meta name="viewport" content="width=device-width, initial-scale=1"> <link href="https://cdn.jsdelivr.net/npm/bootstrap@5.1.3/dist/css/bootstrap.min.css" rel="stylesheet" integrity="sha384-1BmE4kWBq78iYhFldvKuhfTAU6auU8tT94WrHftjDbrCEXSU1oBoqyl2QvZ6jIW3" crossorigin="anonymous"> <title>Custom Consent</title></head><body style="background-color: #f8f5f3;"> <div class="d-flex flex-column min-vh-100 justify-content-center align-items-center mx-auto" style="width: 600px;"> <div class="card"> <div class="card-body"> <h5 class="card-title">Scopes</h5> <form id="scopeForm" action="/accept" method="post"> {{#each scopes}} <div class="form-check"> <input type="checkbox" class="form-check-input" id="{{this.name}}" name="{{this.name}}" checked> <label class="form-check-label" for="{{this.name}}">{{this.display_name}} - {{this.description}}</label> </div> {{/each}} <div class="row"> <div class="col"> <button type="button" class="text-center btn btn-primary mt-3 float-end" onclick="accept()">Accept</button> </div> <div class="col"> <button type="button" class="text-center btn btn-danger mt-3" onclick="reject()">Reject</button> </div> </div> </form> </div> </div> </div> <script> function accept() { document.getElementById('scopeForm').submit(); } function reject() { window.location = '/reject'; } </script> <script src="https://cdn.jsdelivr.net/npm/bootstrap@5.1.3/dist/js/bootstrap.bundle.min.js" integrity="sha384-ka7Sk0Gln4gmtz2MlQnikT1wXgYsOg+OMhuP+IlRH9sENBO0LRn5q+8nbTov4+1p" crossorigin="anonymous"></script></body></html>You can customize this page with any styling of your liking. This given templateis just a sample.
If the user accepts some or all of the scopes, the application should collect all the scopesthe user has accepted and notify Cloudentity usingthe Accept Scope Grant API.
router.post('/accept', function (req, res, next) { let scopes = []; for (const val in req.body) { scopes.push(val); } const data = JSON.stringify({ granted_scopes: scopes, id: appState.id, login_state: appState.state }); submitConsentAndRedirect(res, 'accept', data);});If the user rejects the scope grant request, the application should notifyCloudentity using the Reject Scope Grant API.
router.get('/reject', function (req, res, next) { const data = JSON.stringify({ id: appState.id, login_state: appState.state }); submitConsentAndRedirect(res, 'reject', data);});The response from either of the Cloudentity accept or reject API call includes abody with a redirect_to field. The application should redirect the user to the providedredirect URI which sends the user agent back to Cloudentity.
const submitConsentAndRedirect = async (res, userConsentState, data) => { let CLOUDENTITY_CONSENT_API = getConsentURL(userConsentState); const options = { url: CLOUDENTITY_CONSENT_API, method: "POST", headers: { 'Content-Type': 'application/x-www-form-urlencoded', 'Authorization': 'Bearer ' + appState.access_token, }, data: data } try { let acceptRes = await axiosInstance(options) res.redirect(acceptRes.data.redirect_to); } catch (error) { console.log(error); res.render('error', { msg: 'failed to submit consent acceptance: ' + error }); }}function getConsentURL(userConsentState) { return origin + '/api/system/' + tenant_id + '/scope-grants/' + appState.id + '/' + userConsentState;}Configure the Node.js Application
When we configured the custom consent page in the Cloudentity platform,an application was created for us in the System workspace. All the requiredcredentials and configuration required can be found at the same location where the consentapplication was configured.
Update all the configuration values in the .env file with values extracted from the screen ashighlighted below.
CLIENT_ID="REPLACE_WITH_CONSENT_APP_CLIENT_ID"CLIENT_SECRET="REPLACE_WITH_CONSENT_APP_CLIENT_SECRET"AUTHORIZATION_SERVER_URL="REPLACE_WITH_CONSENT_APP_TOKEN_URL"TENANT_ID="REPLACE_WITH_CLOUDENTITY_TENANT_ID"PORT=4001
By default, the application is configured to use the client credentialsgrant type and the Client Secret Basicas the Token Endpoint Authentication Method.In case you desire to use a different combination, go to the System workspace,find the OAuth client and locate the application with the same name and modify its settings.
Run the Application
To run the application, navigate to the root of the project, install the packages and run:
npm installnpm startAfter running the application, verify that there are no errors and check that the application isrunning by visiting http://localhost:4001/health. You should see that the application is healthy.
Now. let’s check an OAuth flow that involves end user authorization. Go back the workspace inCloudentity and launch the Demo Application.
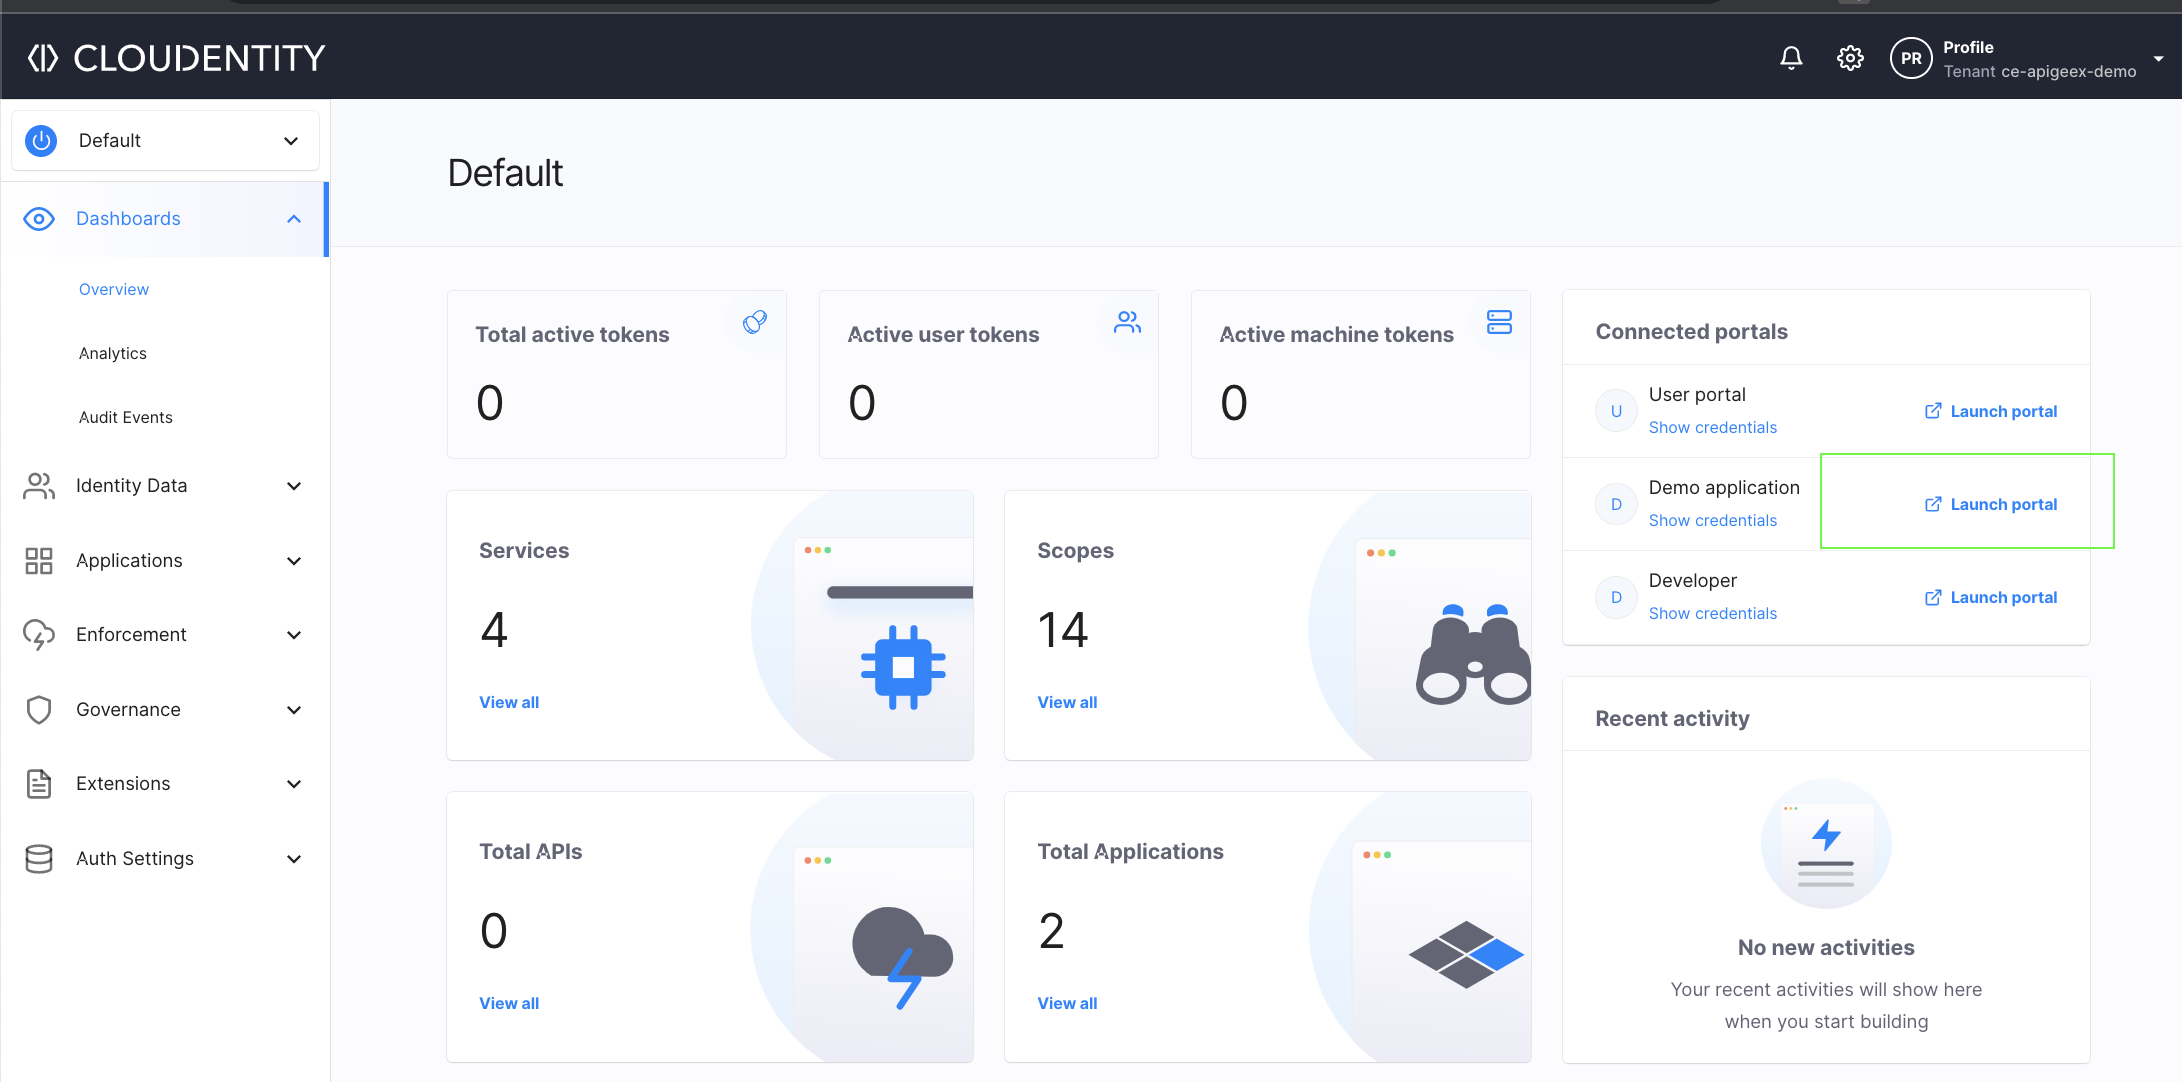
This initiates the OAuth flow.
Once you authenticate with a configured identity provider, you areredirected to the custom consent screen.
Once you accept the consent you are redirected back to the Cloudentityplatform and you can see the access and ID tokens in the Demo Application.

Once you accept the consent, you are not prompted for the consent screen again.In case you want to see the consent screen again, navigate to the Overview tab,launch the user portal (it can be found above the Demo application Launch location),login, and revoke the consented scopes.
Summary
This wraps up our tutorial on how to create a custom consent page for OAuth flows in Node.js.After going through the tutorial you have accomplished the following:
- Build a custom consent page using Node.js
- Configure Cloudentity to use a custom consent page for OAuth flows
- Understand the Cloudentity APIs used for consent management interaction
